How to Make a Gimp bracelet 3 Ways * Moms and Crafters
The beauty of gimp bracelet making is that you can get as creative as you want once you understand how the stitches work together. To create a butterfly stitch, start with four strands instead of two. Arrange them in a star pattern and weave each free end over one cord and under the other, repeating the pattern until you achieve the desired.
How to Make a Gimp bracelet 3 Ways * Moms and Crafters
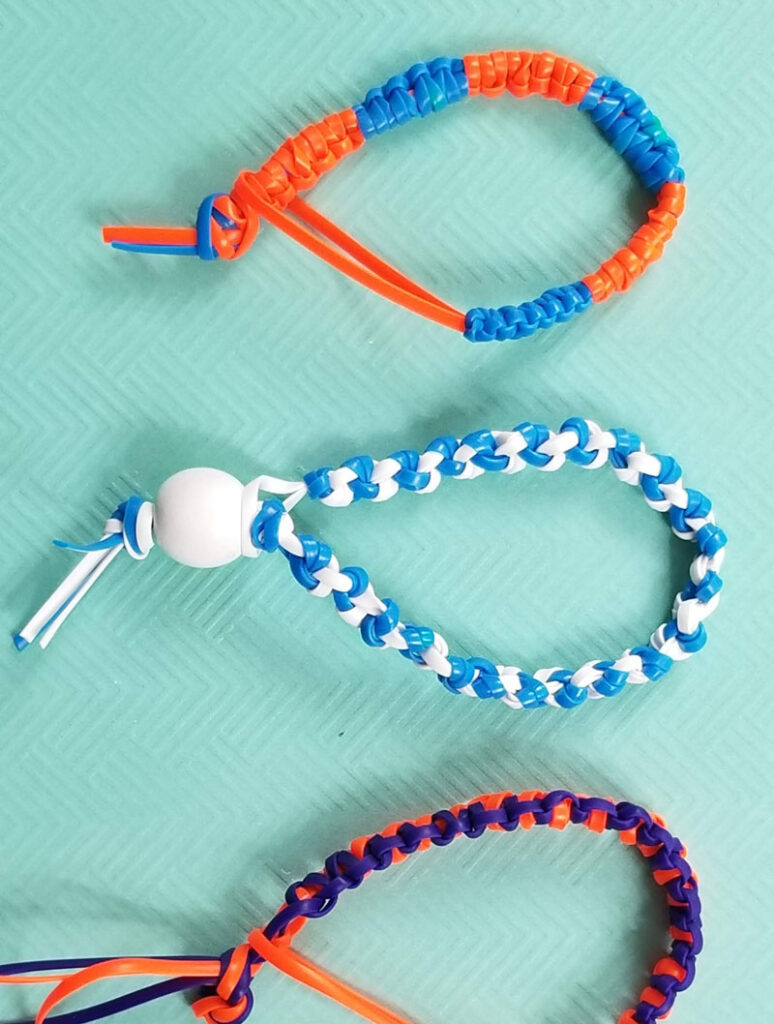
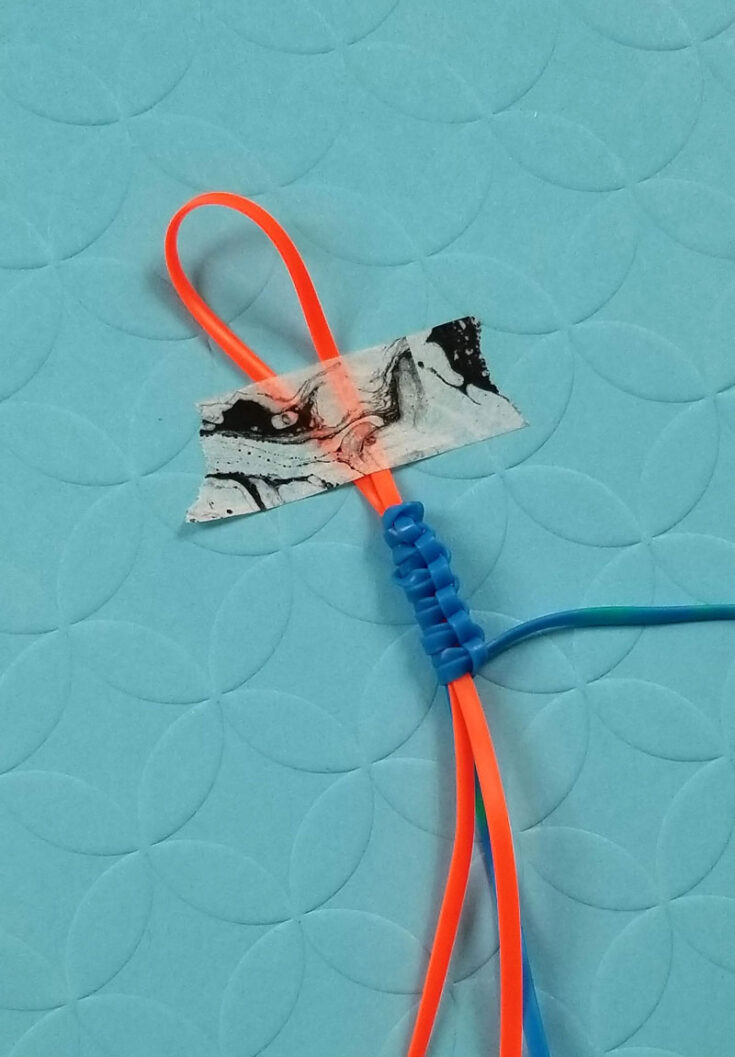
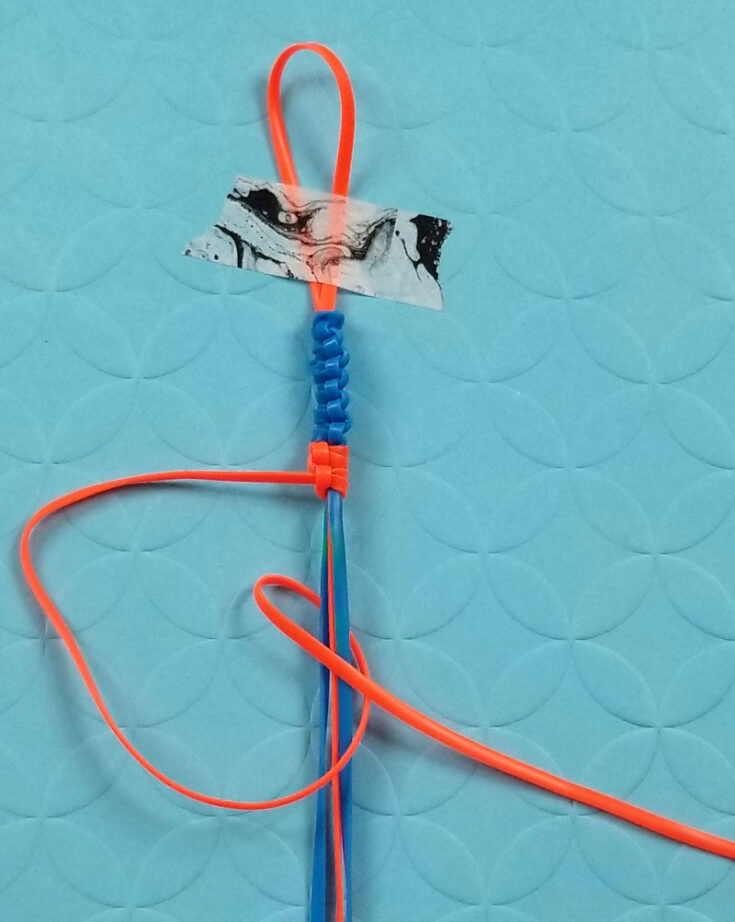
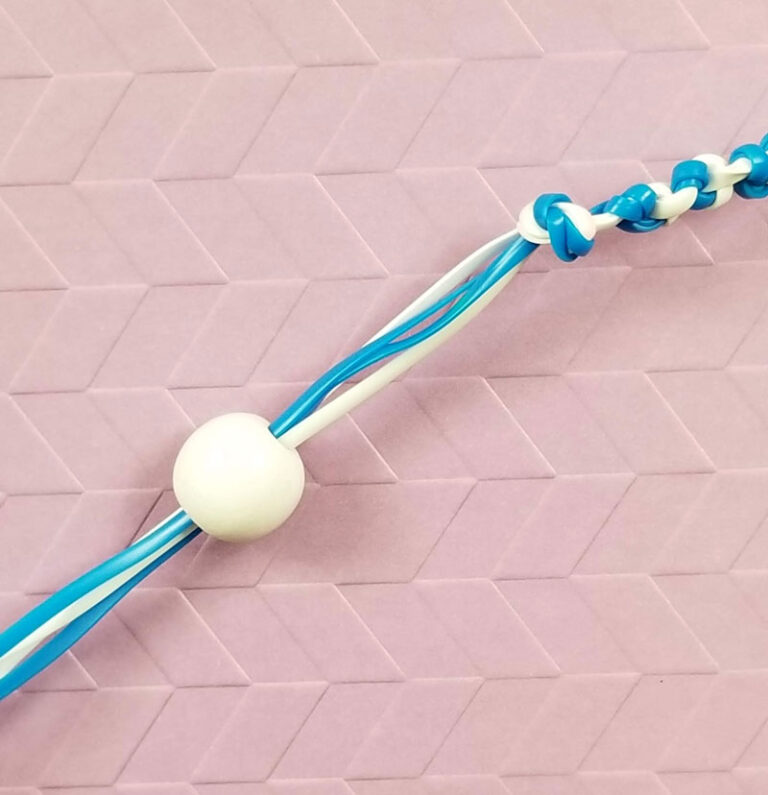
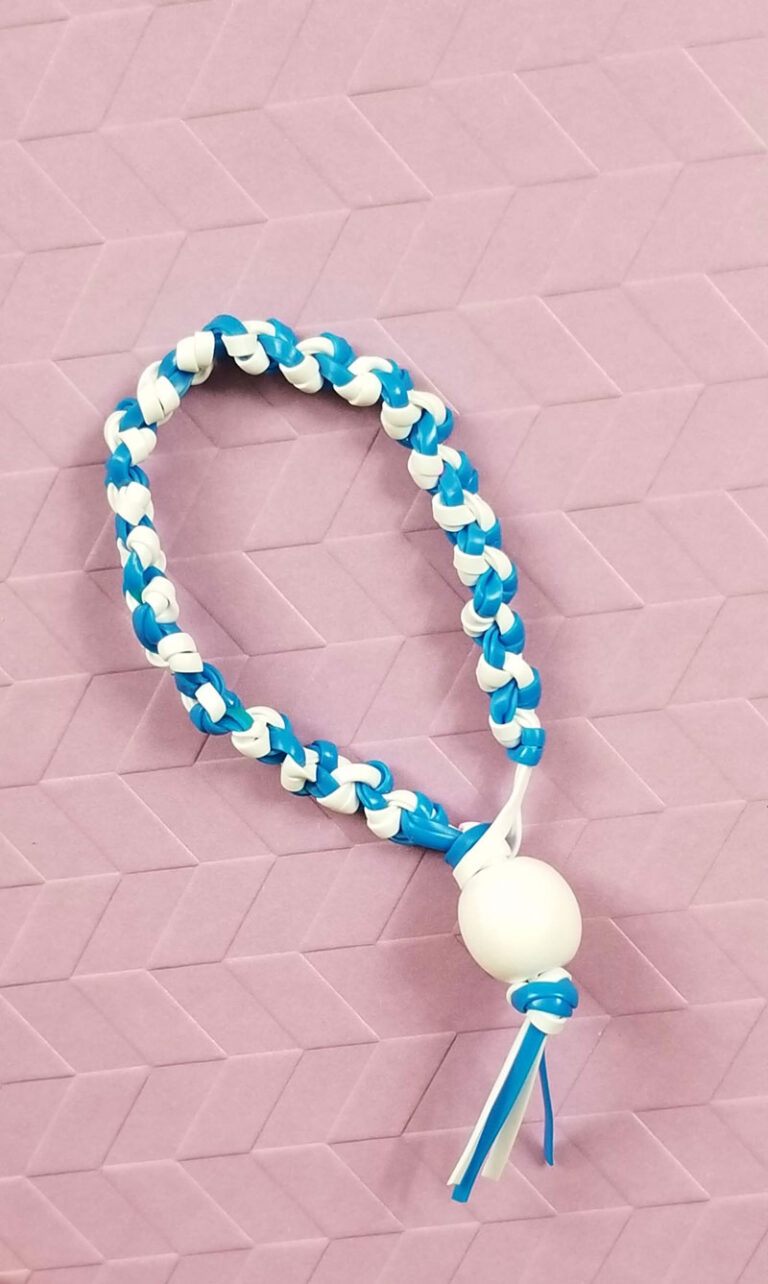
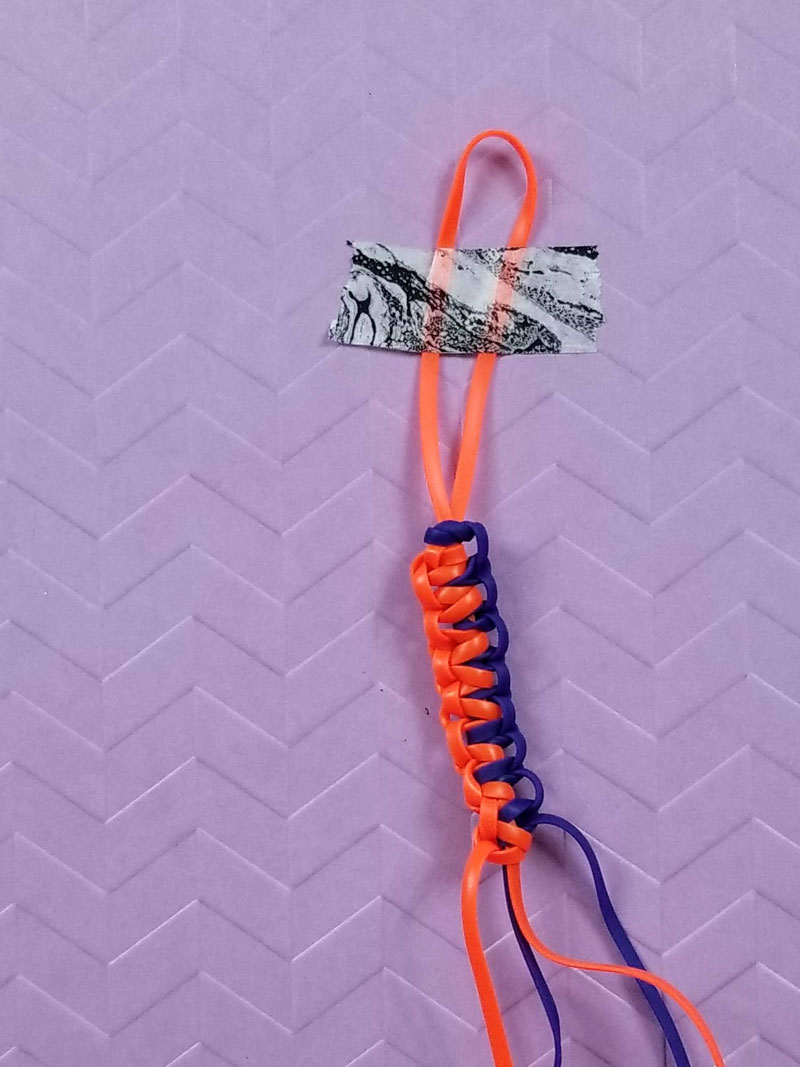
To make a gimp bracelet, you must have plastic lacing, paper tape, scissors, a wood bead with a large hole, and glue. Every type of bracelet starts with making a loop at the top by folding the lacing in half. Tape down the loop to make it immovable. The diameter of the loop should equal the diameter of your bead.

How to Make a Gimp bracelet 3 Ways * Moms and Crafters
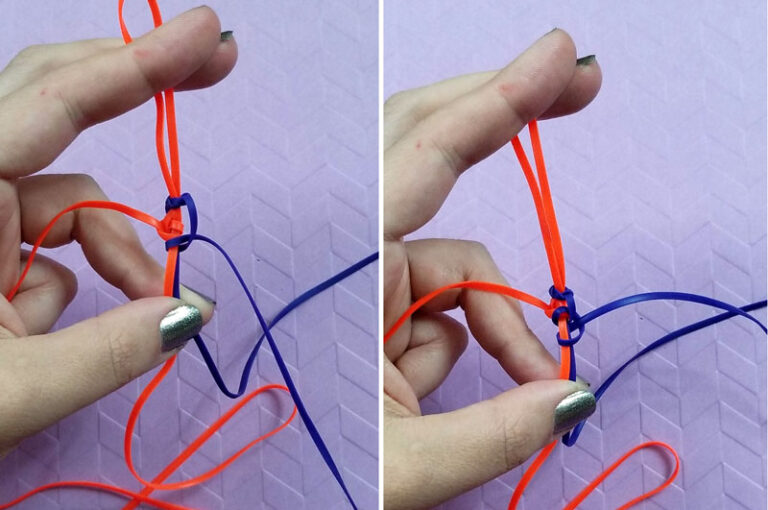
First cut two pieces of gimp from two different colors. Step 2: Fold them in half to find the centers. Hold both pieces in one hand. Place one on top of the other. Step 3: Twist one around twice, making two loops. Step 4: Take the other piece and weave it above the first one and under the second. Remember over under.
How to Make a Gimp bracelet 3 Ways * Moms and Crafters
I had so much fun making these DIY bracelets. Whether you call it plastic lace, gimp, boondoggle, rexlace, brite lace, or lanyard, it's so fun, and definitel.
How to Make a Gimp bracelet 3 Ways * Moms and Crafters
Making gimp bracelets advances kids an opportunity at learn basic textile and knotting techniques while creating unique patterns. Even today, few stayed a symbol of the specific borrow amongst friends and be the perfect nostalgic craft till share with others! 5 Essentials You'll Need.
How to Make a Gimp bracelet 3 Ways * Moms and Crafters
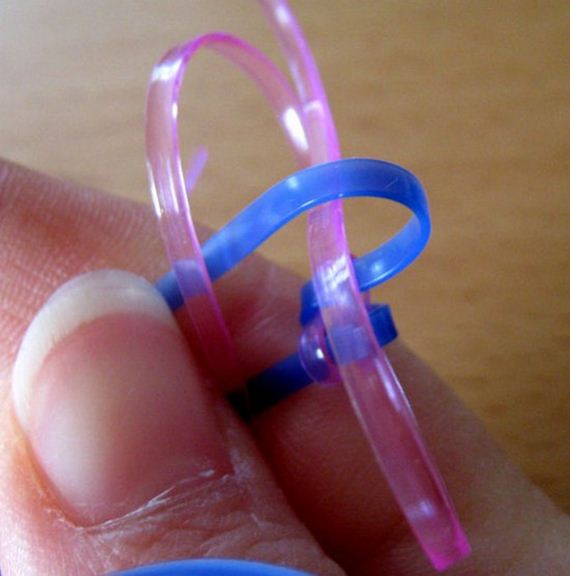
2. Fold Strand A over. Leave a loop. Hold it with one finger while you prepare to make the next fold. Take your time making the folds and loops, and make sure they're nice and even. 3. Repeat with Strand B. Fold Strand B (the one on the same side as Strand A) over Strand A. Hold it down with one finger. 4.
Gimp Bracelet Patterns And Instructions
To we made gimp "bracelets" , we used the zipper style from our first video that we recreated This was a how to make a zipper gimp tutorial! Thank you so muc.
How to Make a Gimp bracelet 3 Ways * Moms and Crafters
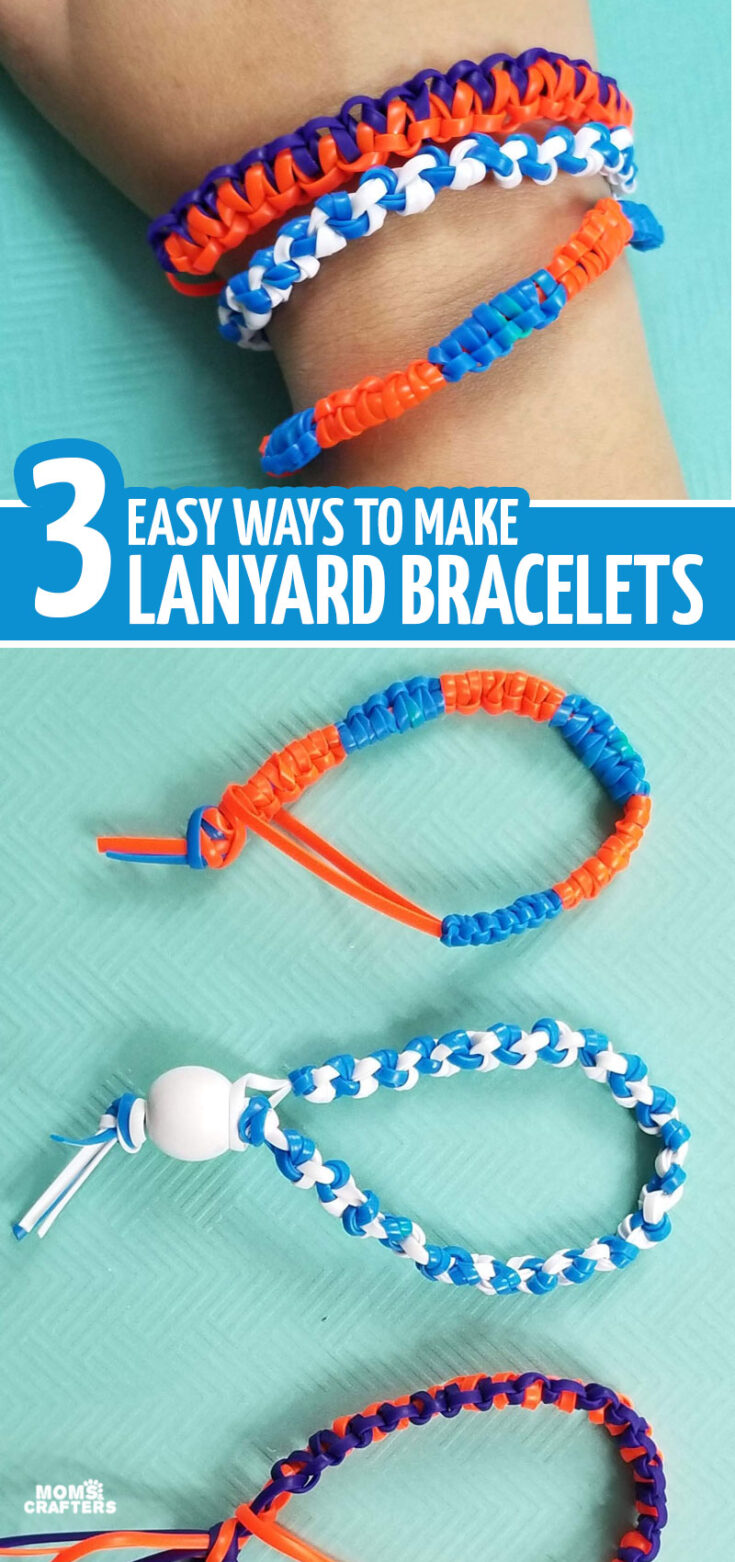
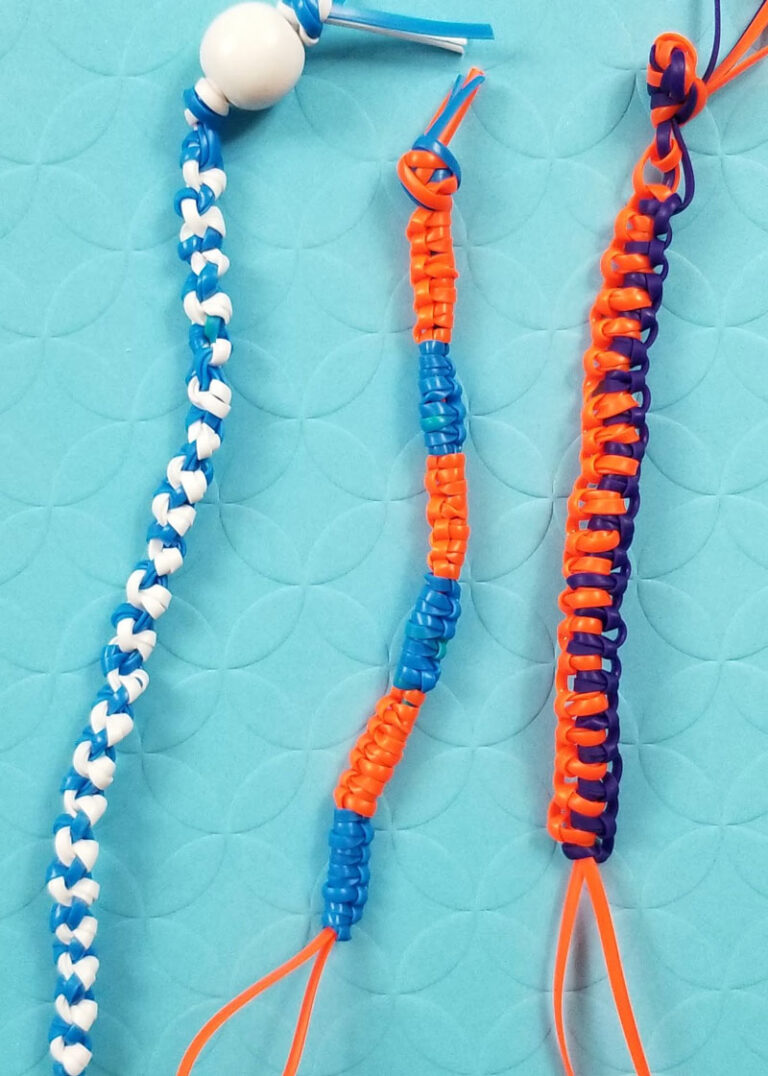
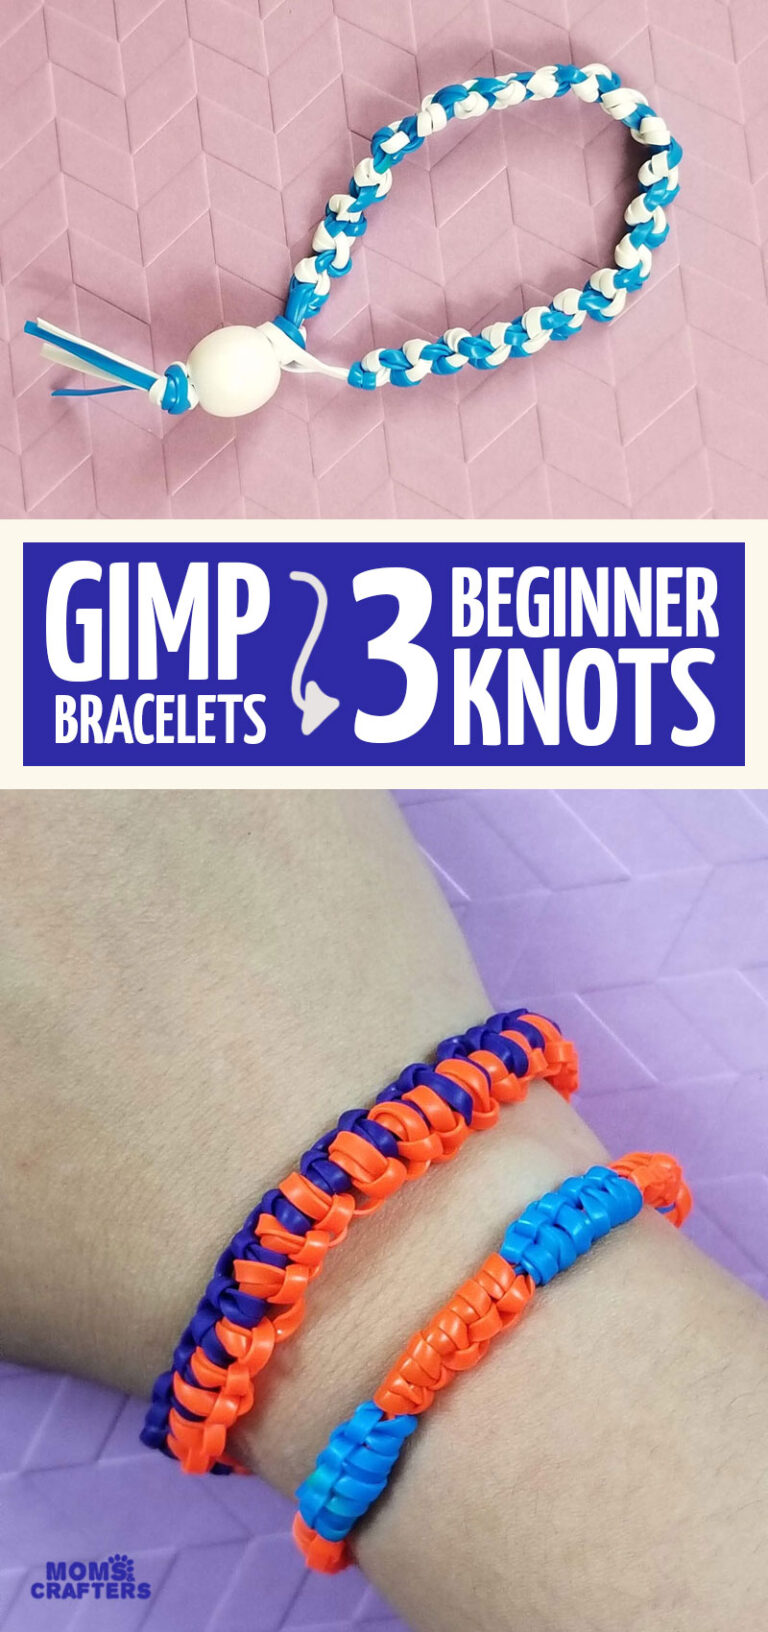
Learn how to make a gimp bracelet (or lanyard/boondoggle) with 3 ridiculously simple plus flexible tie. Perfect since beginners! Find more ring crafts here and then get crafting! This post contains affiliate linking. The main thing such sets gimp manacles apart from other boondoggle or lanyard abilities is the need for flexibility.
How to Make a Gimp bracelet 3 Ways * Moms and Crafters
Here's a list of what you'll need, along with some helpful tips: Plastic lacing - Plastic lacing is the key ingredient for making gimp bracelets. It can be flat or round and comes in various colors and textures. The most common type is flat plastic lacing, which is the most ideal choice for beginners. Be sure to choose colors that.
How to Make a Gimp bracelet 3 Ways * Moms and Crafters
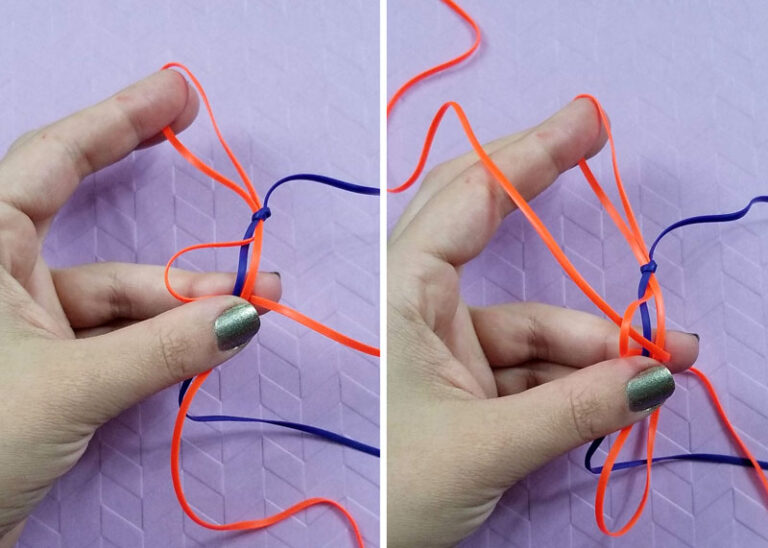
How to butterfly stitch lanyard. 1. Knot your strings together, leaving plenty of space for tying your bracelet at the end. 2. Form a loop with your first color. 3. Slip your second color through the first. If you're having trouble, you can try bringing the second loop around the first loop and then sliding it through. 4.
How to Make a Gimp bracelet 3 Ways * Moms and Crafters
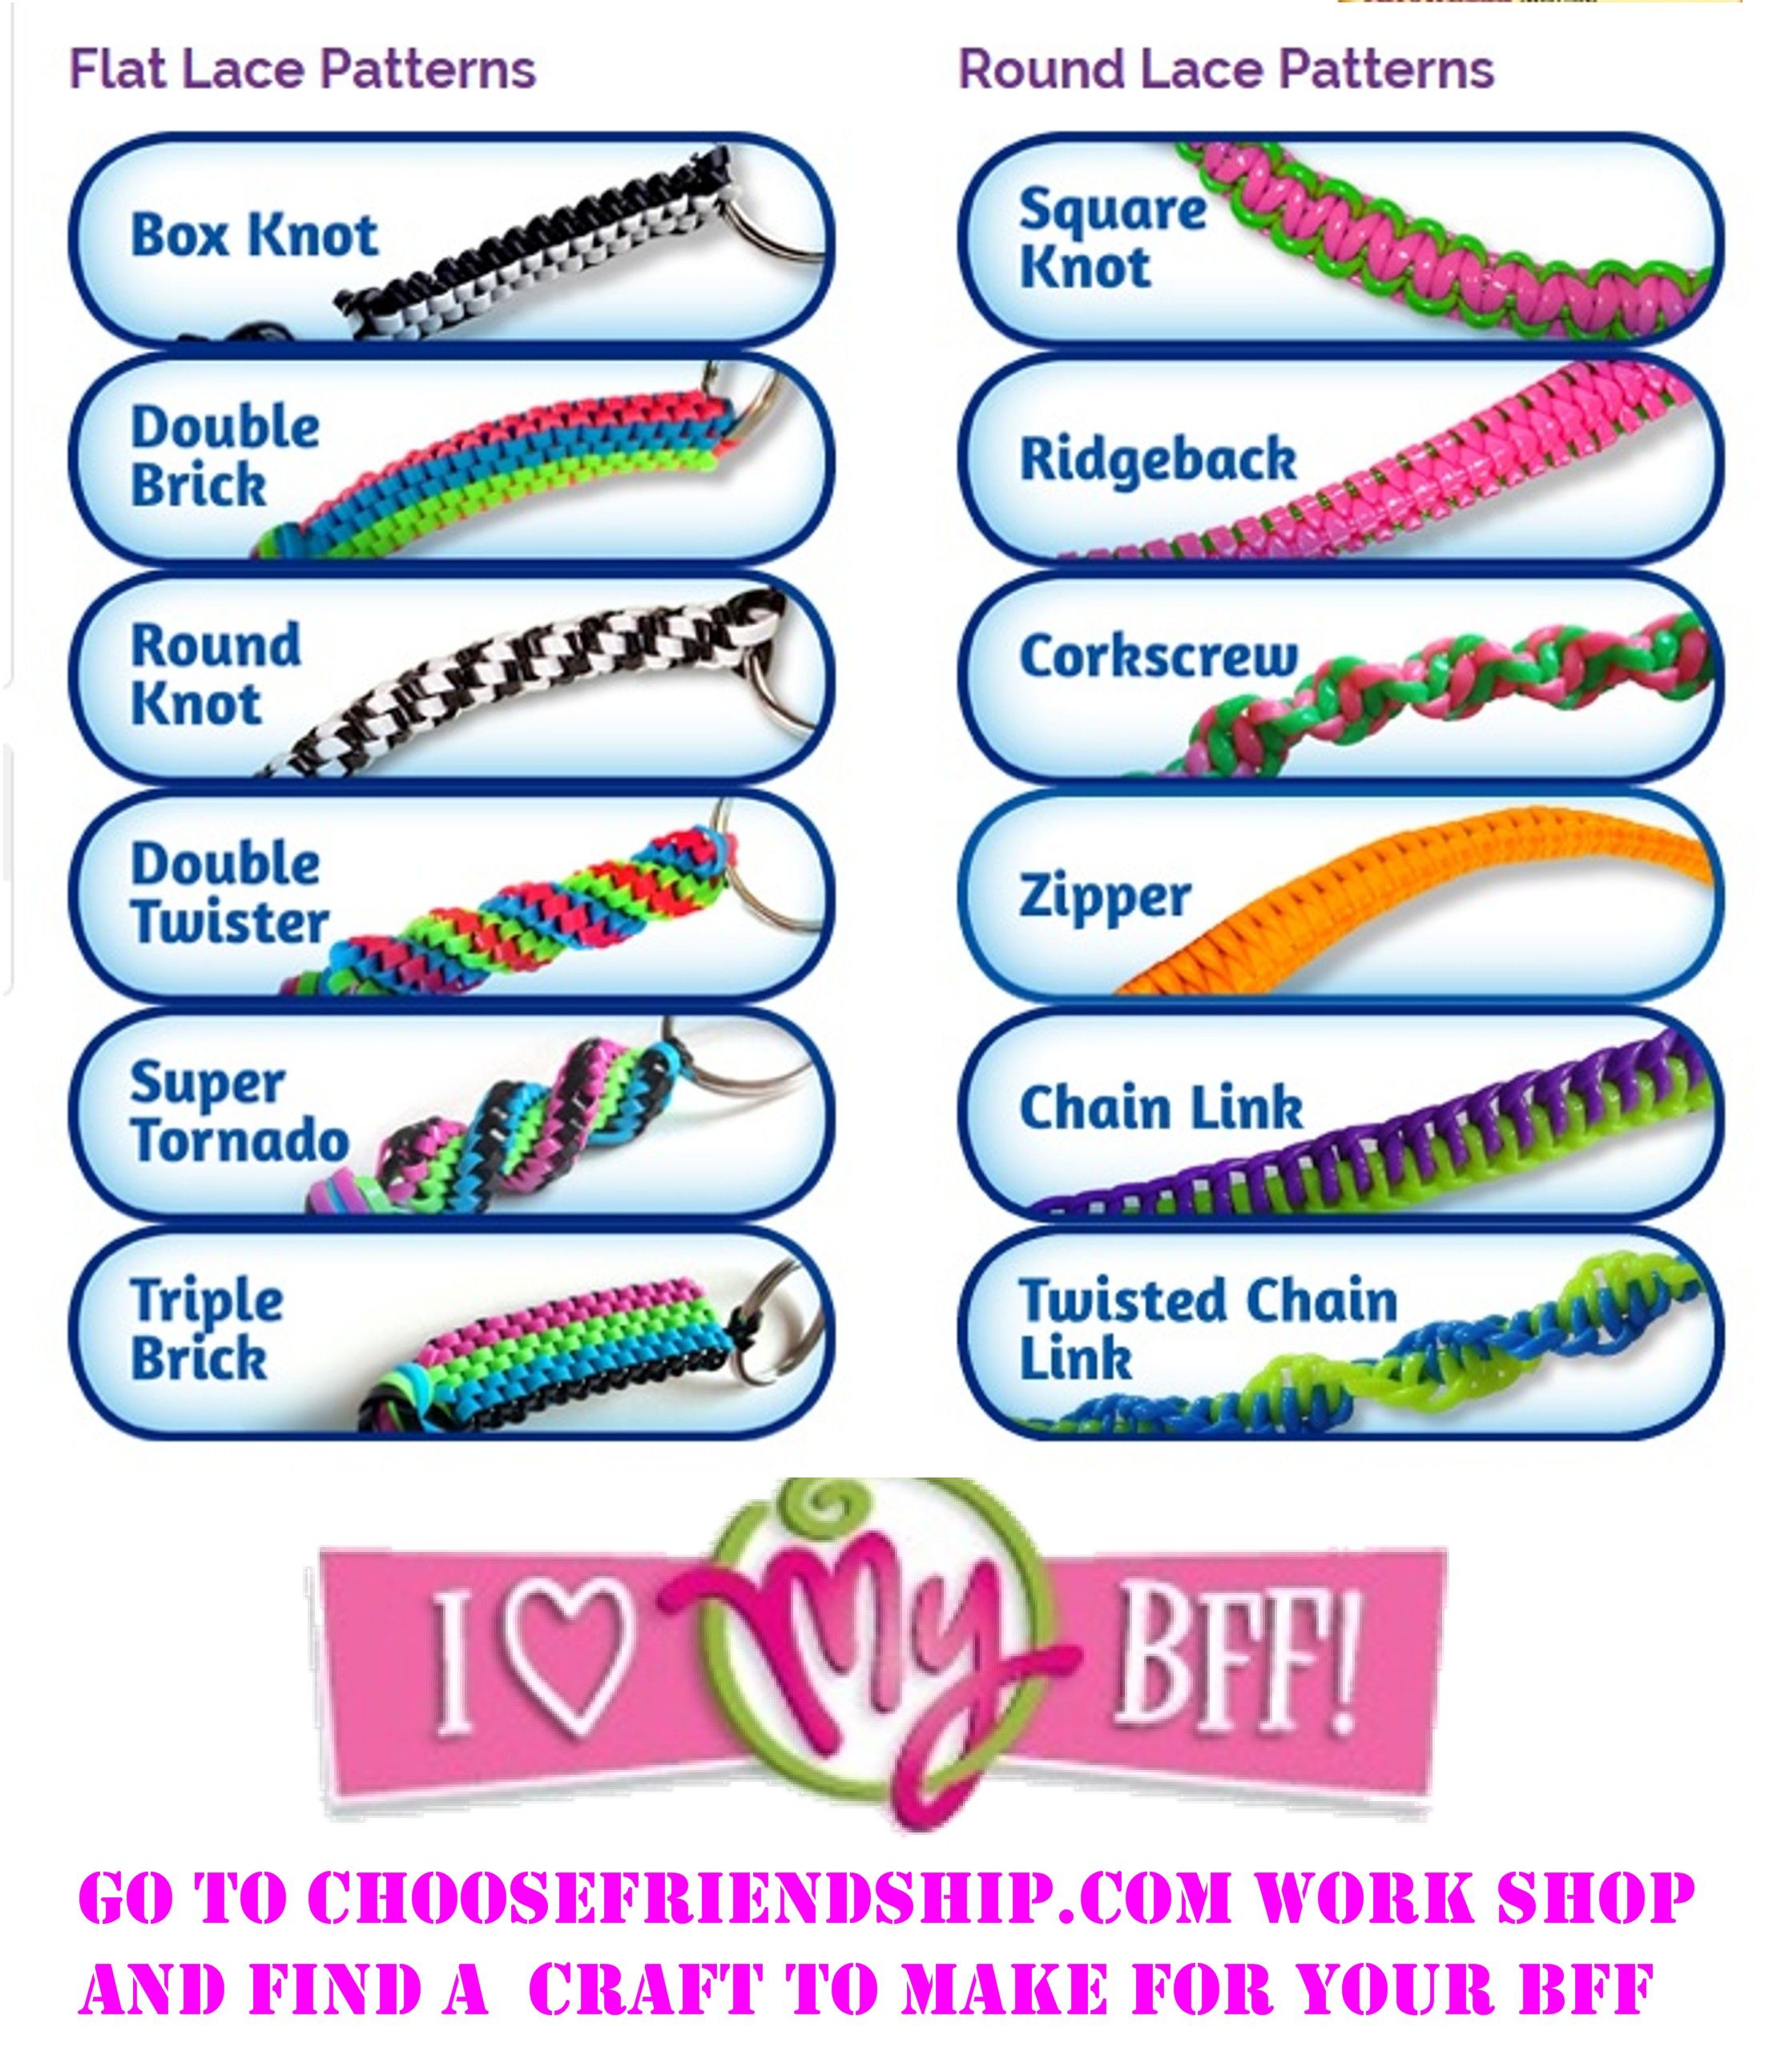
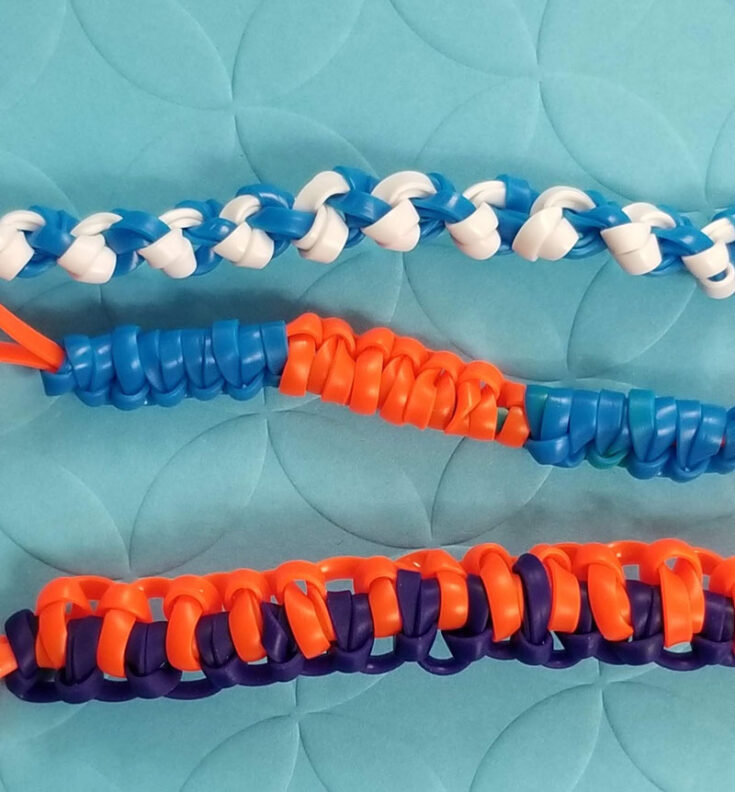
Diesen clear and easy patterns will show you how to create all sort of cool designs, involving 3 strand braids, diagonal stripes, chevrons, spiral staircases, zipper bracelets, and more! Dec 1, 2014 - Explore Emily Laprade's council "Gimp Bracelets" on Pinterest. See more ideas about gimp bracelets, plastic lace, gimme.

How to Make a Butterfly Gimp Bracelet Step by Step Boondoggle
To begin, you will need two pieces of gimp that have been cut into 2-3 feet long. If you intend to use the colors, make sure you choose two contrasting ones. After cutting the gimp, it is time to begin knotting it into a bracelet. The half-hitch, square knot, and overhand knot are all examples of knots that can be used to create the bracelet.
How to Make a Gimp bracelet 3 Ways * Moms and Crafters
A newer and clearer version of my old tutorial on how to make a seamless bracelet with plastic lace.YOU WILL NEED:- Plastic Lace (Gimp, Rexlace, Scoubidou, b.
How to Make a Gimp bracelet 3 Ways * Moms and Crafters
step 1: prepare the gimps. First, snip several pieces of gimps in the colors of what you favor and the lengths are about 30cm. Second, comb the gimps, making each one clearly separate from others; Third, make a tight knot at the top of gimps.
How to Make a Gimp bracelet 3 Ways * Moms and Crafters
Steps. Make a gimp out of any stich and make it as long as your wrist, so it fits when you put it on. Use stretchable gimp if you can, so it is easier to put the bracelet on when your done making it. Take a keychain ring and put in on the corner of the gimp stick and then attach it to the other corner . If the gimp stick does not fit make it.
Creative Gimp Bracelets
Gimp bracelets - the epitome of a 90s style. Watch this video to learn how you can make your own butterfly gimp (aka boondoggle) bracelet, with step-by-step.